Have you ever needed to determine which version of your app users are updating from for data migration purposes? Or perhaps you want to determine the time at which the user opened your app for the first time for analytics purposes? Well, there is an app, er… library for that: AppUpdateTracker.
AppUpdateTracker was created initially as some cobbled code I hastily added within the source of Appirater while working on the UCD Mobile project. I needed the ability to determine not only when the user updated the app, but from which version they are upgrading for in order to perform data migrations within the Core Data store.
I extracted that code into an isolated project and thus, AppUpdateTracker was born. It detects the following events:
when the user launches the app for the first time, provides:
timestamp of when user opened app for the first time, in seconds since epoch
installation count representing the number of times the user has opened the app for the first time on the same device
when the user opens the app for the first time after updating, provides:
the previous version the user updated from
the current version of the app (provided for convenience)
when the user brings the app to the foreground, provides:
usage count representing how many times the app has been opened (includes bringing app to foreground after resigning active, not only cold start)
It works by persisting a small amount information within NSUserDefaults, all of which are directly accessible via getters in the interface. It broadcasts an NSNotification whenever one of the 3 aforementioned events occurs. It is important to note that only 1 event can happen during any given app session, so you needn’t worry about handling the case where an app update notification is broadcast, followed by that of a use count incremented. (The use count is reset to 1 in this case.)
Additionally, I have recently added block support, making usage trivial:
[AppUpdateTracker registerForAppUpdatesWithBlock:^(NSString *previousVersion, NSString *currentVersion) {
        NSLog(@"app updated from: %@ to: %@", previousVersion, currentVersion);
}];
[AppUpdateTracker registerForFirstInstallWithBlock:^(NSTimeInterval installTimeSinceEpoch, NSUInteger installCount) {
        NSLog(@"first install detected at: %f amount of times app was (re)installed: %lu", installTimeSinceEpoch, (unsigned long)installCount);
}];
[AppUpdateTracker registerForIncrementedUseCountWithBlock:^(NSUInteger useCount) {
        NSLog(@"incremented use count to: %lu", (unsigned long)useCount);
}];
Which you are free to call anywhere or anytime within your app (although it is recommended you call these within application:didFinishLaunchingWithOptions:), resulting in one and only one of the 3 blocks being called during any given session (with the exception of registerForIncrementedUseCountWithBlock: being called every time the app is foregrounded).
So there you have it! Easy app update/install tracking for your iOS app. Enjoy!
I own a JVC Everio GZ-MG37U, which is one, if not, the first camcorder to feature an internal hard disk drive for media storage. There are pros and cons to being an early adopter, but a definite con with this purchase was that this camcorder produced a non-popular file video file container format: MOD.
There is an in depth explanation with some issues with MOD files in this article. My biggest grievance (beside lack of software support) is that for some reason the MOD files produced by my camcorder were at least 3 times larger than they needed to be due to creating the video file with overzealous quality attributes (despite having a modest quality setting set on the camcorder). Anyways, enough touting the problems of MOD and onto replacing it!
Finding MOD Files
One way to convert MOD files into another more popular format is to use software that recognizes the file format and then merely export them one by one. I did this for some time on my Windows XP machine with JVC’s Power Director software. But working with a 10 year old machine is aggravating to say the least. Also, I had no idea how MOD files I even had lying around. So I opened up terminal (cmd + space and then type: “Terminal” and then press Enter) and ran this command:
find /Volumes/My\ Drobo/ -type f -name "*.MOD" 2> /dev/null
Let me break this down for those of you that don’t understand what this does:
find is a command that searches your files/folders (you can think of this as a terminal version of spotlight, but much more powerful)
/Volumes/My\ Drobo/ this is the path to the directory that I want to search inside of, merely dragging a directory from a Finder window into the Terminal window will auto populate the directory’s path.
-type f is a flag that tells the find command that it is only looking for files (not directories)
– name “*.MOD” tells the find command that we want it to print out all files that have the .MOD extension
2> /dev/null squelches any output from the find command that is an error. If you omit this from the command you may see a lot of permission denied errors like so (which will muddy up our results):
That is a decent amount of files… too many to warrant me having to manually convert them.
Automation
Considering I am the good kind of lazy — the kind that prefers to make his computer do the work — I wrote the following script:
This file contains bidirectional Unicode text that may be interpreted or compiled differently than what appears below. To review, open the file in an editor that reveals hidden Unicode characters.
Learn more about bidirectional Unicode characters
WARNING: This script will remove your MOD files after creating an mpg4 copy. If you don’t want this to happen merely place a ‘#’ at the left of rm "$i" (line 28) before running the script.
Before running you will need to ensure that you have ffmpeg installed on your machine. You can do that by merely typing ffmpeg into terminal., which should get you:
$ ffmpegffmpeg version 3.1.4 Copyright (c) 2000-2016 the FFmpeg developersbuilt with Apple LLVM version 8.0.0 (clang-800.0.38)configuration: --prefix=/usr/local/Cellar/ffmpeg/3.1.4 --enable-shared --enable-pthreads --enable-gpl --enable-version3 --enable-hardcoded-tables --enable-avresample --cc=clang --host-cflags= --host-ldflags= --enable-opencl --enable-libx264 --enable-libmp3lame --enable-libxvid --disable-lzma --enable-vdalibavutil55. 28.100 / 55. 28.100libavcodec 57. 48.101 / 57. 48.101libavformat57. 41.100 / 57. 41.100libavdevice57.0.101 / 57.0.101libavfilter 6. 47.100 /6. 47.100libavresample 3.0.0 /3.0.0libswscale4.1.100 /4.1.100libswresample 2.1.100 /2.1.100libpostproc54.0.100 / 54.0.100Hyper fast Audio and Video encoderusage: ffmpeg [options] [[infile options] -i infile]... {[outfile options] outfile}...Use -h to get full help or, even better, run 'man ffmpeg'
If you don’t see the above output after entering ffmpeg into Terminal, you need to install it. Here is a handy article that walks you through it.
In order to run the script you will need to change its permissions to be executable so that you may run it. You can do this by entering the following into Terminal:
chmod u+x convert.sh
Now you may run it by changing (cd) to the directory you want to run the command in and typing the following (assuming convert.sh is also in that directory):
./convert.sh .
It’ll start working its magic and will produce output that looks like:
NUI is one of the few handy open-source libraries that allow iOS apps to be styled, much like websites through CSS. This allows for developers and designers alike to quickly make changes in a CSS file to adjust the appearance of various UI components in your app. No more dealing with the cumbersome UIAppearance and having to dig through code to make changes. This allows for the nontechnical people on your team to directly tweak and fiddle with the app to their hearts’ content, leaving us developers to concentrate on the moreimportant aspects of the app. 😉
There was Pixate (changed trajectory and was acquired by Google), UISS (inactive), and Nimbus (feature development inactive). However, NUI is the only one that managed to stand the test of time, is actively developed, and reasonably popular (3382 stars at the time of this writing). I have used NUI in a few projects I work on and really love its power. I’m not going to lie, it is quite an investment to setup and maintain throughout your project, but really pays off long-term. In this post I cover how to get up and running with NUI.
First consult the installation section in NUI’s Readme. You can install the manual way or through CocoaPods, pick your poison. If you are installing through CocoaPods you need to add pod ‘NUI’, ‘~> 0.5’ to your Podfile before hitting your terminal with a pod install.
Protip!
If CocoaPods just created a .xcworkspace file for you and spit out this bit of advice:
[!] Please close any current Xcode sessions and use `NUITestApp.xcworkspace` for this project from now on.
Close out of your project and reopen from the workspace before proceeding.
Add the following to your AppDelegate file:
#import <NUI/NUISettings.h>
// ...
- (BOOL)application:(UIApplication *)application didFinishLaunchingWithOptions:(NSDictionary *)launchOptions {
// Override point for customization after application launch.
[NUISettingsinit];returnYES;
}
Building and running should display something like so:
If you don’t have a problem with building an ugly looking app, you are pretty much done, but if you actually want to make something that is appealing to the eyes, read on!
Customization
If you take a look at NUI’s init method, you’ll see this:
It can be deduced from this that in order to use a style sheet of your own you need to call NUI’s initWithStylesheet: method. Well let’s get to it then, ey?
Create a new empty file and give it a cool, hipsteresque name like CartmanBrah.nss, or if you want to be boring like all other developers in the iOSphere you can give it a “proper” name, like MyProperlyNamedStyleSheet.nss.
Protip!
Be sure to set the extension of the file to .nss as that is what NUI expects the extension of the style file to be.
Change the NUI init method to specify the new file you created:
[NUISettingsinitWithStylesheet:@"CartmanBrah"];
Adding a NUI Element from a Storyboard
Let’s lay down some styles in that new file, ey? (No, I’m not Canadian, I just really like saying ‘ey’). Put something like this in your newly-created style sheet:
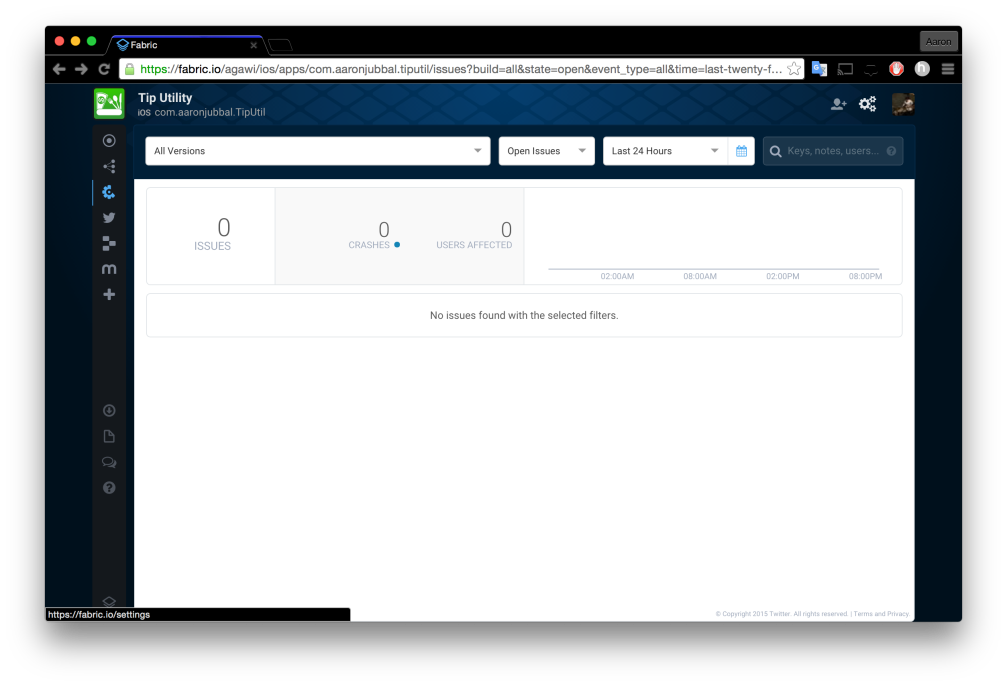
Crashlytics by Fabric is a great tool for alerting you of all those nasty crashes in your iOS app. It is part of the larger Fabric library which is developed by Twitter. Fabric offers a bunch of handy features such as a beta build distribution service akin to TestFlight (via Beta), high-level analytics reporting (Answers), user authentication via phone number (Digits), and more. Considering all of this comes for free, there is little reason to not try it.
One thing I try to always do in my apps is to segregate production and development data. I do this to ensure that no production data gets skewed with my overly obsessive testing regiment (which is almost always done with DEBUG builds). In this post I will be instructing you on how to set up your iOS project to automagically accomplish this with Crashlytics.
So let’s get started, shall we? Go ahead and login to your Fabric dashboard and select Settings from the gears icon next to your user profile image in the upper right corner of the screen.
From there click Organizations.
Add a new organization either for debug or production (I’ll be adding an organization for debug).
Once you create the new organization, it may take some time for it to show you as an admin in it. Be sure to refresh the page to see the page depicting you as the admin for the new organization.
Note: It may take a bit of time for it to update, so you may have to be a little patient.
Make note of your API Key and Build Secret as you will be needing them in the near future.
Now head back to your project and find where you call Crashlytics with your current key (typically in the application:didFinishLaunchingWithOptions: in your AppDelegate).
Remove [Crashlytics class] from that line (or remove that line entirely if it is your only class in that call) and place this code before that line:
 #if DEBUG

[Crashlytics startWithAPIKey:@"<debug crashlytics api key>"];

#else

[Crashlytics startWithAPIKey:@"<release crashlytics api key>"];

#endif
Go into your project settings and place DEBUG=1 in the Debug portion of Preprocessor Macros (if it isn’t already there). Ensure this set for the proper target as well as the project itself!
Now you want to update your Crashlytics run script. If you have yet to make a run script for Crashlytics, do the following: From within project settings click on your application’s target, then click on the Build Phases “tab”. From there click on the ‘+’ in the upper left corner of the pane and select New Run Script Phase.
Enter this code into the script area for the Crashlytics Run Script:
if [ "${CONFIGURATION}" = "Release" ]; then

"${PODS_ROOT}/Fabric/run" <release API Key> <release Build Secret>

else

"${PODS_ROOT}/Fabric/run" <debug API Key> <debug Build Secret>

fi
And there you have it! Crashlytics data for testing and production isolated into their own organizations. You can test this out by inducing a crash in your app while testing in debug and release modes.
I began working on an iOS project that began as a simple subclass of a UITextField. But as requirements grew I kept adding subclasses of other UIControls to the project and decided that it would be appropriate to change the name of the project to something more generic.
With newer versions of Xcode, it is quite simple to rename your project. A mere (slow) double-click of the project within Xcode allows for the text of the project to be changed, after which a popup displays asking if you want additional parts of the project to be auto-renamed.
This works great, until you realize that your Pods are spitting out various compilation errors and you look back at your terminal to see the following CocoaPod warning (following a pod install):
[!] CocoaPods did not set the base configuration of your project because your project already has a custom config set. In order for CocoaPods integration to work at all, please either set the base configurations of the target MyApp to Pods/Target Support Files/Pods/Pods.debug.xcconfig or include the Pods/Target Support Files/Pods/Pods.debug.xcconfig in your build configuration.
What you want to do in this case is clear your botched rename attempt and try again by first running (for those with git) git reset --hard (WARNING: USE WITH CARE) to get back to your original project.
Now, this time, before renaming the project, we want to remove CocoaPods and its settings from our project. Don’t worry though! We are going to re-add CocoaPods back to your project before this is all over. The general procedure looks like:
1. remove CocoaPods
2. rename project
3. re-add CocoaPods to your project
First, install cocoapods-deintegrate, a handy tool that takes care of removing all CocoaPods settings from your project. Once installed, move to the directory containing your .xcodeproject file and run pod deintegrate. (Note: [!] A valid Xcode project file is required. will appear if you have multiple .xcodeproject or .xcworkspace files in the directory, so ensure that you have at most 1 copy of each.)
Once it finishes doing its thing, open the xcodeproject project, NOT the workspace (close the xcworkspace project if you have it open), and rename your project by slowly clicking the project name in the left pane.
Once renamed, close the project and change your Podfile’s target names (if needed). For instance, if you were renaming STATextField to STAControls, you would want to change this:
target 'STATextFieldTests', :exclusive => true do
  pod 'KIF', '~> 3.0'
end
to this:
target 'STAControlsTests', :exclusive => true do
  pod 'KIF', '~> 3.0'
end
Then run pod install. Be sure to trash the old .xcworkspace file, and open the newly created .xcworkspace file (the one CocoaPods tells you to use: [!] From now on use `STAControls.xcworkspace`.).
Now try building and running. It should work if you don’t have any tests in your project.
I unfortunately did have tests in my project and ended up with the following linker error: ld: file not found: /Users/aaron/..../Build/Products/Debug-iphonesimulator/STATextField.app/STATextField
To fix this, I needed to update the value of BUNDLE_LOADER within Build Settings of my test target (STAControlsTests) from: